Most cable failures start as hidden strand breaks near the drum or bottom bracket, not in the middle where you’d expect. You’ll cut power to the opener, clamp both tracks, and verify the door’s fully closed before you touch a cable. Then you’ll identify torsion vs. extension setup, gather rated parts, and release spring tension correctly—or stop and call a pro. Next comes inspecting, replacing, and rebalancing the door so it moves safely under controlled tension.
Key Takeaways
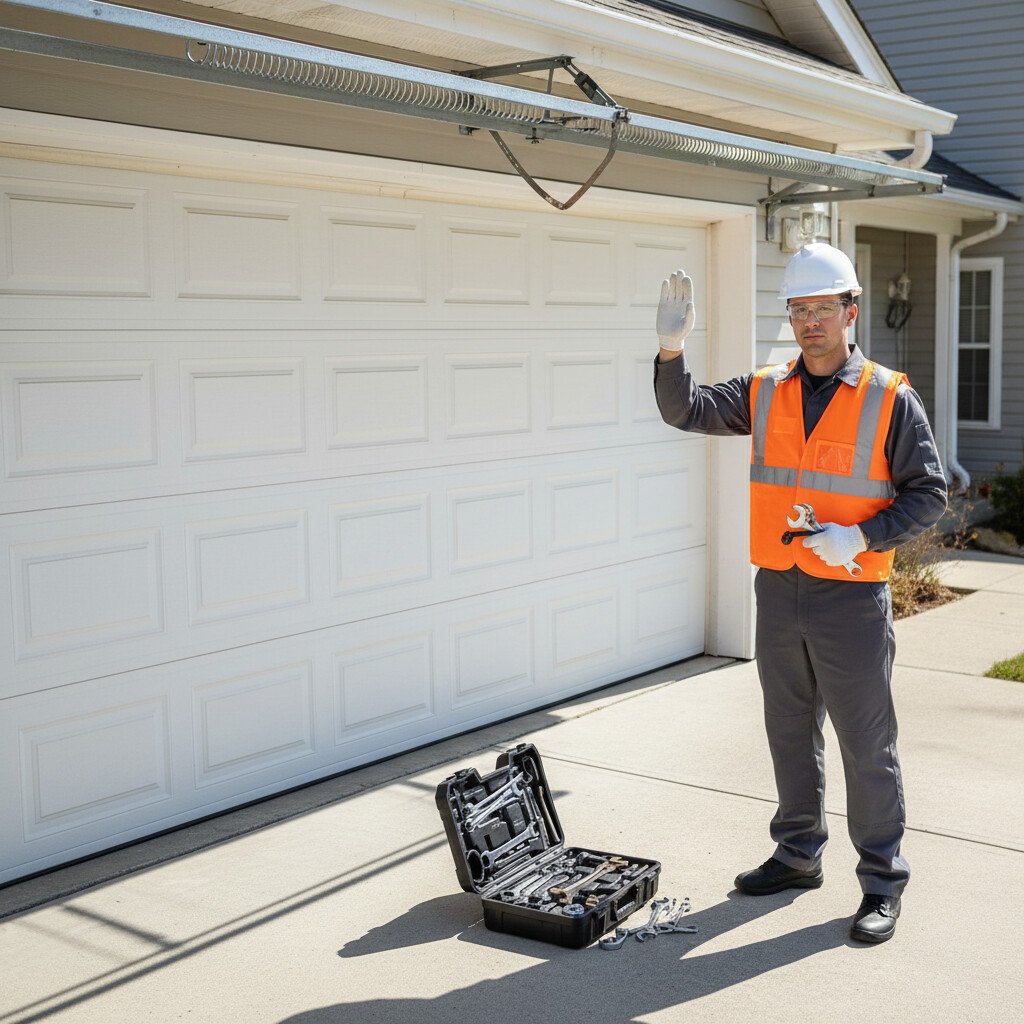
- Unplug the opener, lock the door to the tracks with clamps, and wear eye protection and gloves before any inspection or work.
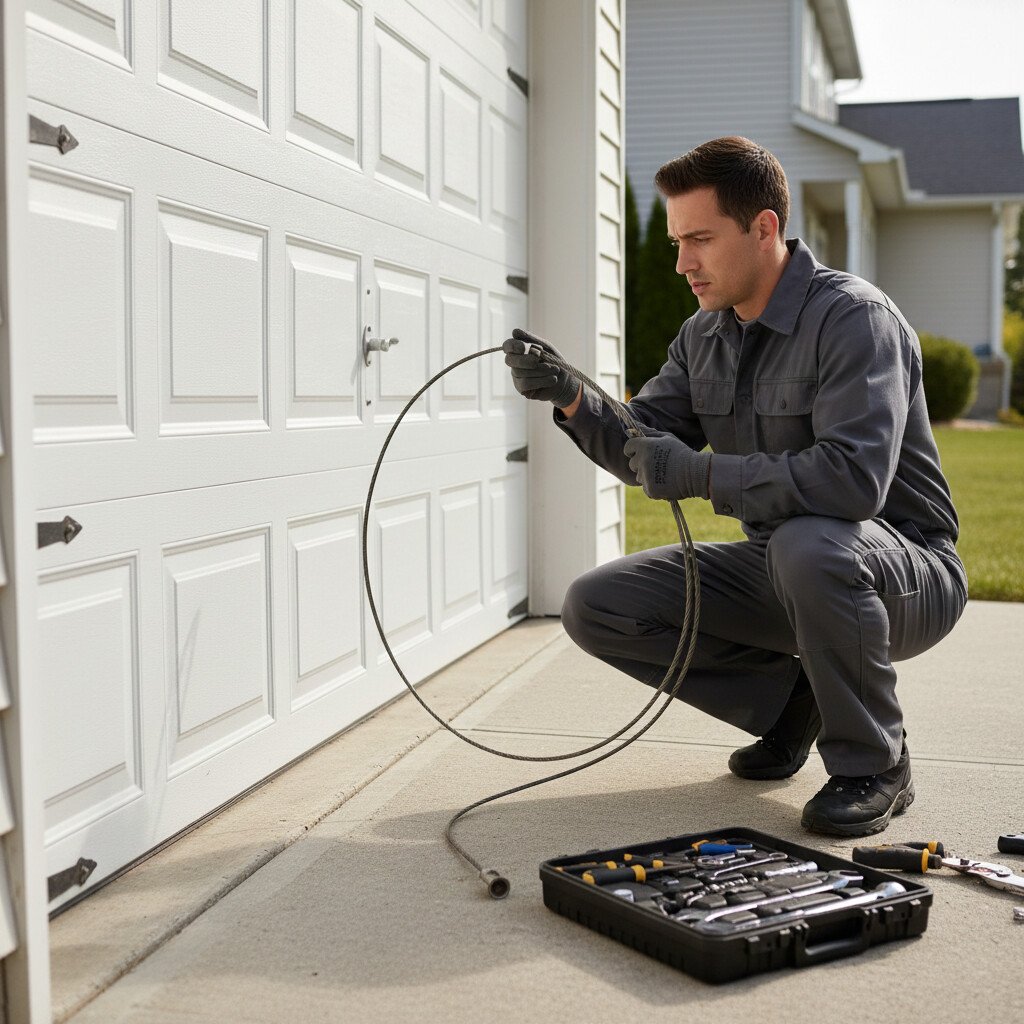
- Inspect cables under bright light for frays, kinks, rust, broken strands, bulges, and damaged crimps or thimbles; replace if any damage is found.
- Diagnose symptoms like uneven lifting, drifting, slack, or jerky travel to identify misrouted drum wraps, worn cables, or failing pulleys.
- Only repair minor issues such as loose clamps or misrouting; otherwise, replace cables and avoid adjusting spring tension without manufacturer procedures.
- Keep drums and pulleys clean, lubricate pulleys lightly (not cables), verify equal drum wrap, and confirm set screws are properly torqued.
Safety First: When to Stop and Call a Pro
Before you touch a cable, pause and assess risk: garage door systems are under high spring tension and can cause severe injury.
Disconnect power to the opener. Block the door fully closed with locking clamps on both tracks.
Disconnect the opener’s power. Secure the fully closed door with locking clamps on both tracks.
Perform a brief cable inspection: look for frays, kinks, broken strands, rust, slipped drums, or uneven tension.
If the cable’s bird‑nested, the drum set screws are damaged, or a torsion spring is cracked, stop.
Don’t remove cones, drums, or bearings without proper tools. Wear eye protection and gloves.
If you’re unsure about spring state, drum alignment, or anchor integrity, seek professional assistance immediately.
Cable work is one of the easiest places to misjudge load and lose control of the door. This guide on why DIY garage door repairs can be risky for homeowners breaks down the common failure points that turn a “simple fix” into a dangerous situation.
Diagnose the Garage Door Cable Problem
Start by unplugging the opener and clamping the door to the track.
Then inspect cables for fraying, kinks, rust, broken strands, and loose or missing end fittings.
Next, check operational symptoms: uneven lifting, door drifting or slamming, excessive slack on one side, jerky travel, or the opener straining.
Note which side and component shows issues to pinpoint whether the problem is a worn cable, misrouted drum wrap, or failing pulley.
Visual Wear Indicators
Red flags on the cable tell you when it’s unsafe to operate the door.
Begin with a visual inspection under bright light. Lock the door down, disconnect power, and keep hands clear of drums and springs.
Examine the full cable length: look for frayed strands, flattened spots, kinks, birdcaging, rust pitting, and broken wire ends near swages.
Check diameter uniformity; bulges indicate internal cable deterioration. Inspect thimbles, crimps, and anchor points for cracks, slippage, or sharp edges that cut wires.
Verify the cable tracks are correctly on the drum grooves. If corrosion, strand loss, or deformation is present, tag out and replace.
Operational Symptom Check
With the visual checks complete, confirm what the door’s behavior tells you about the cable’s condition.
Pull the opener release; keep the door secured. Lift manually in 1-foot increments. Note resistance changes—uneven lift suggests mismatched cable tension.
Pause at mid-span; a drifting panel indicates imbalance. Check door alignment against tracks; gaps or rubbing imply slack or frayed strands.
Lower slowly; jerky descent signals frayed windings or drum slip. Listen for snapping, grinding, or drum clicking.
Inspect drum wrap uniformity while an assistant stabilizes the door. If the door won’t stay put at mid-height, stop. Lock the door and de-tension safely before proceeding.
Tools and Parts for Garage Door Cable Repair (Torsion vs. Extension)
Inventory matters: gather the exact tools and replacement parts for your door’s spring system—torsion or extension—before you touch a cable.
Identify your setup: center shaft with drums means torsion; side pulleys and stretch springs mean extension.
Identify your setup: center shaft and drums mean torsion; side pulleys and stretch springs mean extension.
For torsion cables: get matched-length, 7×7 or 7×19 galvanized cables with pressed thimbles, new bottom brackets if worn, winding bars (pair, correct diameter), 3/8–7/16 in. sockets, open-end wrenches, C-clamps, pliers, torque wrench, thread locker, and safety glasses.
For extension cables: select the correct-length cables with S‑hooks/loops, safety containment cables, new pulleys if rough, cotter pins, adjustable wrenches, C-clamps, tape measure, light oil, rags, and gloves.
Cable repairs go wrong most often when the wrong cable type or hardware is chosen for the spring system. Before ordering anything, review this garage door parts guide for identifying the correct cables, drums, and related hardware so your replacement matches your setup and maintains proper tension.
Prepare the Door: Unplug, Secure, Release Tension
Start by killing power and movement: unplug the opener, pull the emergency release to disengage the trolley, and ensure the door is fully closed and resting on the floor.
Place locking pliers or C-clamps on both tracks just above the bottom rollers to immobilize the door.
Verify spring type. For torsion systems, only use proper winding bars; never use screwdrivers.
Carefully unwind spring tension in controlled quarter-turns until cables slacken.
For extension systems, open the door fully, clamp it, then remove energy from each spring with safety cables intact.
Perform a quick cable inspection for frays or kinks.
Document drum set-screws’ positions for later tension adjustment.
Before you touch any cable hardware, it helps to follow a complete safety sequence—power lockout, door stabilization, pinch-point awareness, and safe testing afterward. Use this garage door repair safety checklist for homeowners to make sure your setup is safe before you continue.
Repair or Replace Garage Door Cables
Start by inspecting for frays, rust, kinks, broken strands, or flattened sections; if you see any of these, plan to replace the cable, not patch it.
Only consider a repair when a cable is intact, and the issue is limited to a loose clamp, misrouted cable, or minor end-stop adjustment.
Estimate 1–2 hours and low cost for a repair, and 2–3 hours and higher parts cost for a full replacement, always following lockout and tension-release procedures.
Cable work can look straightforward, but the real question is whether you can do it safely without throwing off balance or dealing with loaded components. This guide on choosing DIY or professional garage door repair safely explains the key risk factors before you continue.
Signs Cables Need Replacement
Although cables can fail suddenly, you can spot early warning signs before a breakdown. Start with the door fully closed, the opener unplugged, and the tension contained.
Visually inspect each lift cable for cable deterioration: broken strands, rust pitting, flattened spots, or kinks. Check drum wraps and anchor points for fray or slippage. Listen for scraping when lifting manually; feel for uneven resistance. Measure the door level on the floor; sag indicates an imbalance.
- Frayed strands or “birdcaging” along the length
- Orange-brown corrosion at swages, drums, or anchors
- Uneven cable tension or slack on one side
- Metal dust near drums signaling wear
These are definitive replacement signs.
When Repair Is Safe
If your inspection confirms minor wear without structural damage, you can make limited repairs instead of a full replacement.
Verify garage door safety first: disconnect power, clamp tracks above rollers, and fully relax spring and cable tension per manufacturer’s procedure. Proceed only if cables show light fraying at ends, intact strands, no kinks, and no pulley or drum cracks.
Replace end sleeves, re-seat cable on drums, and lubricate pulleys—not the cable. Realign tracks, then restore tension gradually, checking balance at mid-travel.
Test force-reverse and manual lift. If tension won’t hold, strands are crushed, or drums are scored, replace cables.
Addressing frayed cables early with fast garage door repair can prevent sudden system failure.
Cost And Time Estimates
Two factors drive your decision: parts cost and labor time under safe, de‑tensioned conditions.
Start with a cost breakdown: replacement cables run modestly; add drums, fasteners, and safety cables if worn. Factor tools you may need to buy or rent.
Your time commitment includes isolating power, clamping the door, releasing spring tension with proper bars, swapping cables, re-tensioning, and testing balance.
- Price parts first; replace in pairs to keep symmetry.
- Budget for contingencies: frayed drums or bent brackets.
- Allocate 2–4 hours for careful, stepwise work.
- If torsion springs remain energized, stop and call a professional.
Test, Rebalance, and Lubricate the Garage Door
Before any adjustments, verify the door’s basic operation to ensure the cables and hardware are functioning safely.
Pull the opener release, then lift the door halfway; it should hold. If it drifts, rebalance.
Close the door, clamp tracks above rollers, and adjust spring tension only if you’re trained; otherwise, call a pro.
Check cable tension visually—both sides must match—and confirm door alignment by measuring gap uniformity at jambs and floor.
Reconnect the opener and run a full cycle, listening for binding.
Lubricate hinges, rollers (bearings only), and torsion/extension springs with garage-door lubricant. Wipe excess.
Don’t lubricate tracks.
Retest balance.
Prevent Frayed, Slipped, and Snapped Garage Door Cables
While cables look simple, preventing frays, slips, and snaps starts with disciplined inspection and correct tensioning.
Perform cable maintenance monthly: unplug the opener, clamp the door to the tracks, and use a flashlight. Scan each strand for broken wires, rust, kinks, and pulley misalignment. Verify equal drum wrap, then adjust tension only with manufacturer-approved procedures. Replace any cable showing corrosion, necking, or flattened sections. Confirm track, drum, and bearing cleanliness to reduce abrasion. Apply a light, non-gumming lubricant to pulleys, not the cable.
- Keep drums clean and set screws torqued.
- Replace worn pulleys immediately.
- Maintain the spring balance.
- Use stainless or galvanized cables as preventive measures.
Conclusion
You’ve learned to pause, protect, and proceed with precision. Prioritize power-off, position the door, and place locking clamps. Probe cables for frays, flats, or kinks, then pick the proper parts and follow the manufacturer’s tension specs. Practice methodical moves: release tension safely, replace or rewrap, retest balance, and lubricate lightly. If steps seem sketchy or springs scream risk, stop and seek a seasoned specialist. With steady focus and strict safety, you’ll keep your garage door gliding, guarded, and dependable.