By coincidence, your timeline hinges on details you might overlook: door type, opener choice, and site conditions. You’ll assess for 30–45 minutes, stage the area for 20–30, and lay out hardware in 15–20. Removing the old door and aligning tracks can add hours if framing needs correction. Springs and opener setup demand precision and balancing. You want a realistic schedule, minimal downtime, and safe operation—but one factor often shifts everything.
Key Takeaways
- Assessment, staging, and layout typically take 65–95 minutes combined before removal begins.
- Removing the old door and hardware usually takes 60–90 minutes with two people and proper safety procedures.
- New door and track installation with weatherproofing commonly requires 2–3 hours, depending on framing corrections and alignment.
- Opener installation and calibration add 60–120 minutes, varying by drive type and wiring complexity.
- Final testing, adjustments, and user walkthrough take 30–60 minutes, confirming safety features and balanced manual operation.
Planning, Site Prep, and Time Estimates
Define door type, opener class, and track configuration. Verify rough opening, headroom, backroom, and side clearances against manufacturer specs. Measure and record tolerances; confirm framing, jamb plumb, and slab level. Check power, opener support blocking, and sensor paths.
Plan installation in milestones: site prep, layout, hardware staging, panel assembly, spring setup, opener integration, and commissioning.
Prepare a parts checklist (fasteners, anchors, torsion hardware, lift cables, weatherseal) and stage tools, PPE, and ladders to minimise handling.
Allocate time: assessment (30–45 min), staging (20–30), layout/marking (15–20), plus a 10–20% buffer for adjustments. Document dependencies (e.g., track type dictates bracket placement) and lock inspection points before proceeding.
To prevent delays before you start, follow garage door installation planning tips so tools, materials, and site prep are ready on day one.
Removing the Old Door and Hardware
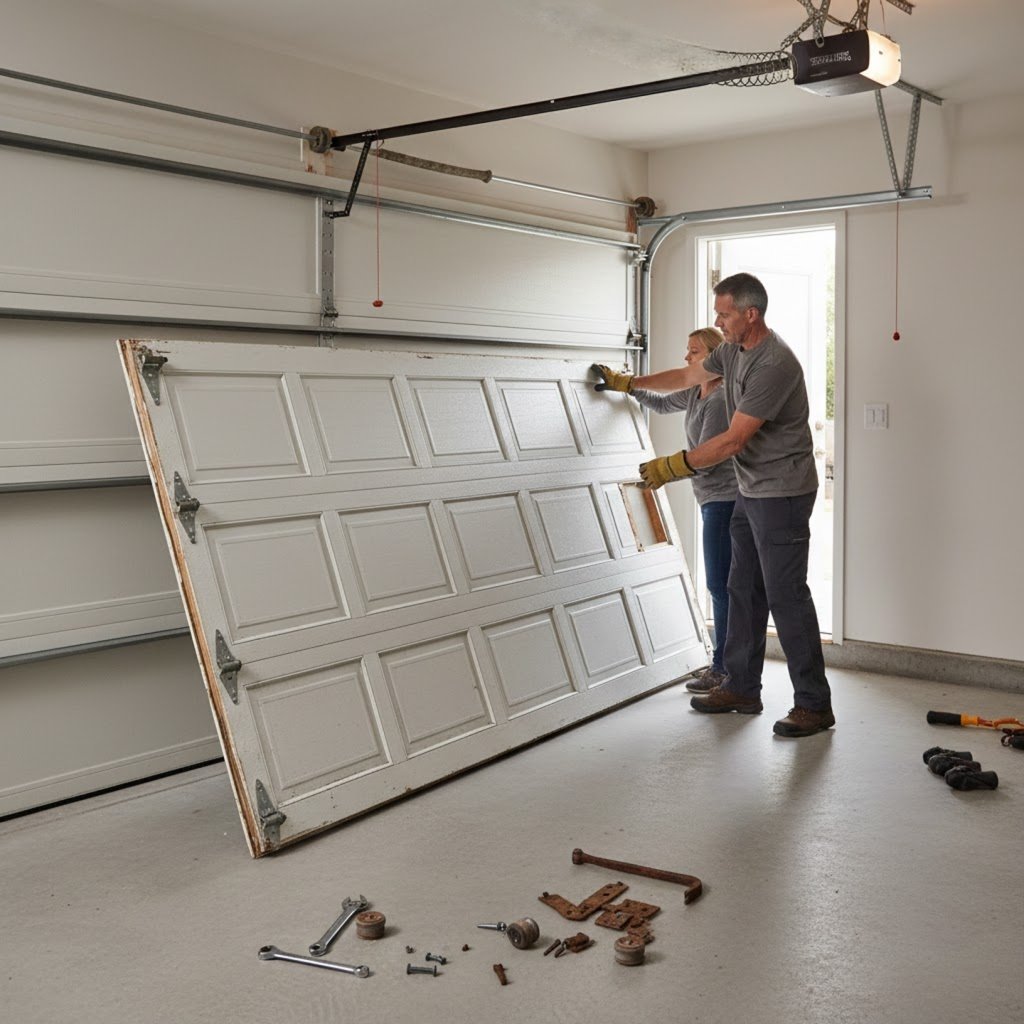
Start by securing the work zone, locking out power to the opener, and releasing spring tension per manufacturer specs.
You’ll then disconnect the opener arm, unbolt hinges and tracks in sequence, and lower panels safely with a helper.
Finally, dispose of the door and hardware per local rules, clear debris, and check the opening for level, plumb, and anchor readiness.
Before removing any hardware, review garage door installation safety tips to reduce risk around tension parts and heavy panels.
Safety Precautions First
Always prioritise safety before starting. De-energise and stabilise the system before removal.
Wear ANSI-rated eye protection, cut-resistant gloves, and steel-toe shoes. Lock out power at the breaker and confirm zero voltage with a non-contact tester. Block the door fully closed with rated clamps and secure the torsion shaft with locking pliers.
- Ensure the door is anchored, wheels immobilized, cables slack, and hands clear of pinch points.
- Confirm the opener is unplugged, breaker tagged, tester green, and cords clear of ladders.
- Stage tools (winding bars, socket set, impact driver, magnetic trays) for easy access, away from suspended parts.
Maintain clear egress paths and communicate movements.
Disconnect and Dismantle
Two clean breaks define this phase: isolate the opener, then free the door sections.
Pull the emergency release to decouple the trolley, unplug power, and remove the opener arm pin. Verify the door is secured with clamps above the rollers. Release spring tension using winding bars; never remove hardware under load. With tension neutralized, detach lift cables and drums.
Use disciplined disconnect methods: label fasteners, back out bolts in pairs, and support each panel before removal.
Starting at the top, unbolt hinges, slide rollers from the tracks, and lower sections carefully. Remove vertical and horizontal tracks, then the spring shaft, bearings, and center bracket. Extract the opener header bracket and remaining angle iron.
Keep dismantle tools staged: winding bars, sockets, impact driver, vise-grips, pry bar, and a magnetic tray.
Dispose and Prep Area
With the last fasteners out and hardware staged, shift to clearing the site and readying the opening.
Sort sections, tracks, springs, and fasteners by material to streamline disposal methods and recycling. Cap exposed wires, bag small parts, and sweep debris to maintain garage cleanliness. Inspect framing for rot, rust stains, and anchor damage. Vacuum tracks’ footprints and scrape adhesive residue from the slab to ensure true level.
- Stack door sections flat on moving blankets, label metal vs. wood, and load recyclables first for a single trip.
- Roll up insulation, plastic, and packaging; bag sharp waste; stage torsion tubes and rails parallel to prevent bending.
- Degrease jambs, chalk plumb lines, and verify header height and side clearances match the new door’s spec.
Framing, Weatherproofing, and Opening Adjustments
Before hanging tracks or mounting the opener, ensure the rough opening is square, level, and plumb. Confirm header spans and king/jack studs meet load requirements.
Install straight jambs (1×6 or steel), shim to 1/16-inch tolerance, and fasten with structural screws. Check sill height and adjust framing for a uniform reveal.
Weather-seal the perimeter before installing hardware: apply self-adhered flashing at jamb-to-sheathing joints, integrate housewrap shingle-style, and set a continuous sill pan or high-modulus sealant.
Install composite jamb covers and threshold where needed. Use durable materials: butyl flashing, closed-cell backer rod, polyurethane sealant.
Verify opening dimensions vs. door size, maintain 1/2–3/4-inch side clearance, and correct racking.
Accurate garage door installation measurements help avoid rework during framing and ensure the opening is ready for a proper fit.
Track, Rollers, and Panel Assembly
Start by dry-fitting the vertical tracks to the jambs, confirming plumb within 1/16 inch and equal reveal to the door edge.
Clamp them, verify track alignment with a 4-foot level, then anchor using lag screws into framing.
Clamp the tracks, check with a 4-foot level, then lag them solidly into framing.
Assemble the bottom panel on shims, insert rollers, and seat stems in the track without forcing.
Select roller types—nylon for quiet, steel for heavy-duty—matching stem length to hinge gauge.
- 1) You slide the bottom panel in, its edges parallel to the slab, light seeping evenly under the seal.
- 2) You guide each roller into the curved track, hearing a clean, centered glide.
- 3) You stack panels, hinges snug, seams straight like a ruler.
Install horizontal tracks level, brace hangers to joists, and confirm parallel spacing before tightening all fasteners.
Spring System Setup and Balancing
Tracks set and panels stacked true, you move to the counterbalance. Mount the center bearing plate, end bearings, and torsion tube.
Seat drums, cable stops, and lift cables. Verify cable routing is square and taut with door fully down. Install torsion springs with winding cones inward. Lock the door to prevent movement.
Set initial spring tension per door weight: typically 7.5 turns for 7-ft doors, 8.5 for 8-ft, adjusting per manufacturer data. Wind evenly on both springs, tighten set screws to proper torque, then align drums and equalize cable wrap.
Perform balancing techniques: raise door to mid-travel; it should hover without drifting. Fine-tune quarter turns until lift force equals door mass.
Check full cycle for smooth travel, cable tracking, and zero coil bind.
Spring setup time depends on using the right garage door installation components, especially springs rated for your door’s weight and cycles.
Opener Installation, Wiring, and Smart Features
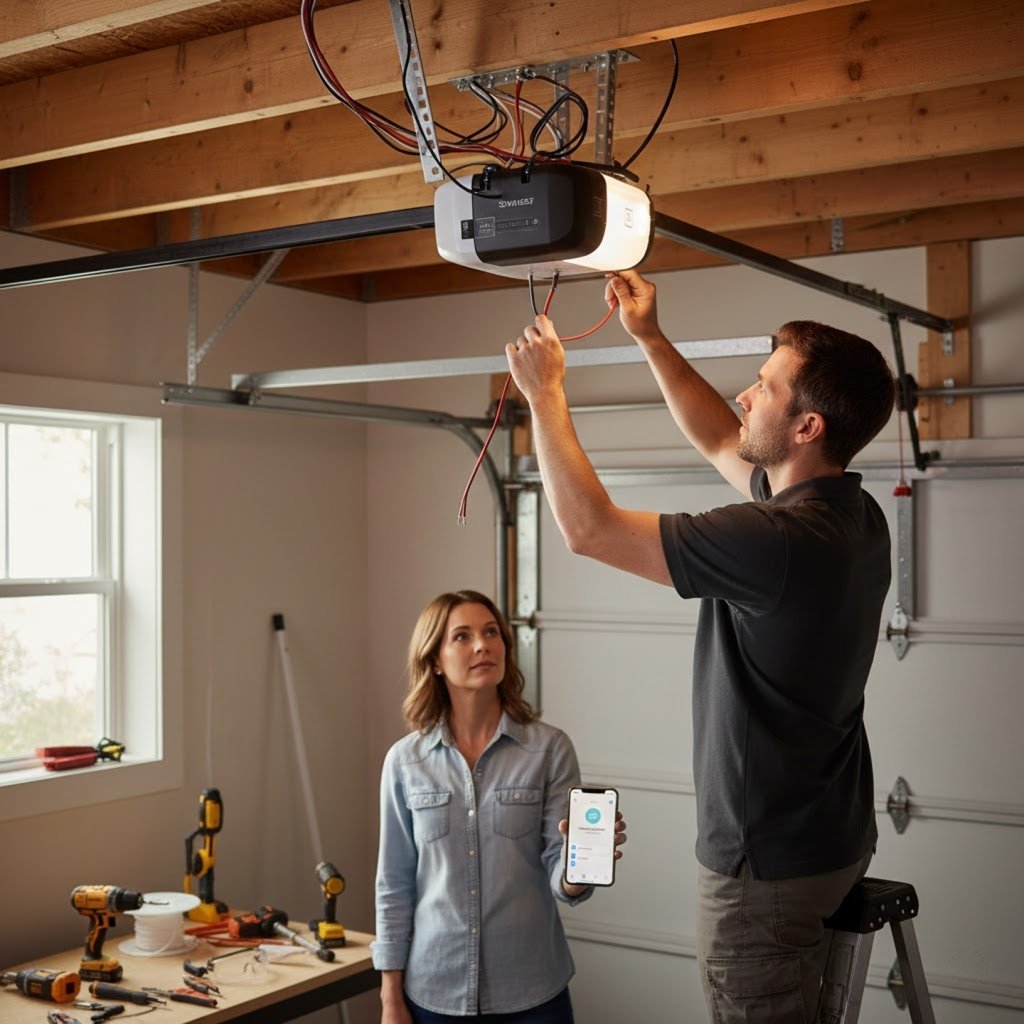
Although the door now balances correctly, the opener adds its own requirements: select a drive type (belt for quiet, chain for durability, DC jackshaft for high-lift/limited headroom), confirm horsepower/current draw matches door weight and springing, and verify clearance to the header, ceiling, and rear support.
Mount the rail or jackshaft bracket to solid structure, plumb and square. Align the trolley or torque shaft, then secure the header bracket and rear hangers to eliminate sway.
Run low-voltage bell wire to wall control and photo-eyes using tidy wiring methods: staples perpendicular to conductors, drip loops, and slack at terminations. Provide a dedicated receptacle on a GFCI-protected circuit if required. Integrate smart features via Wi‑Fi, bridge, or HomeKit module.
1) Conduit hugging joists
2) Level rail slicing ceiling line
3) Smartphone commanding closure
Installation time can increase with smart features, so selecting the right garage door opener helps you plan wiring, setup, and calibration.
Calibration, Safety Tests, and Final Walkthrough
Calibrate travel limits and force so the opener stops at the floor and just below the header without binding.
Set down travel to compress the seal, back off, and set up travel so rollers avoid stops. Adjust force for light-resistance reversal.
Align photo-eyes, confirm indicators, and test beam obstruction for reversal. Perform a 2×4 reversal test; the door must reverse on contact.
Check balance by disconnecting the opener; the door should stay mid-travel. Tighten hardware, test manual release, and verify wall control, remotes, and keypad.
Conclude with a user walkthrough, maintenance schedule, and emergency procedures.
Conclusion
You’ll plan like a mission commander, staging, laying out, and timing each phase with near-orbital precision. You’ll strip the old door, true the frame, and dial in tracks, rollers, and panels as if tolerances were microns. You’ll tension springs like a watchmaker and wire the opener like avionics. Then you’ll calibrate, test safeties, and document. It won’t just be hours—it’ll feel like engineering eternity. But when it glides silently, you’ll swear time bends to craftsmanship.