You can spot garage door wear fast with a five‑minute check: scan panels, hinges, rollers, and tracks for cracks, rust, or loose fasteners; lift the door halfway to test balance; and listen for grinding or bangs. Lubricate rollers and hinges with a light garage‑safe lubricant, and tighten hardware. Stop if you see frayed cables, cracked springs, or bent tracks—those are pro jobs. Next, you’ll set safe opener limits and fix common alignment issues.
Key Takeaways
- Perform a five-minute safety check: inspect panels, hinges, rollers, and tracks for cracks, bends, looseness, and unusual noises.
- Test door balance and auto-reverse: it should hold halfway and reverse on a 2×4; verify photo-eye LEDs are solid.
- Clean tracks and photo-eyes; vacuum debris, wipe rails with solvent, and never grease tracks.
- Lubricate moving parts quarterly: steel rollers, hinges, and spring coils with light lithium spray; avoid nylon roller treads.
- DIY tighten loose fasteners; call a pro for spring tension, frayed cables, misalignment, sharp bangs, or door not holding mid-travel.
Do a 5‑Minute Garage Door Safety Check
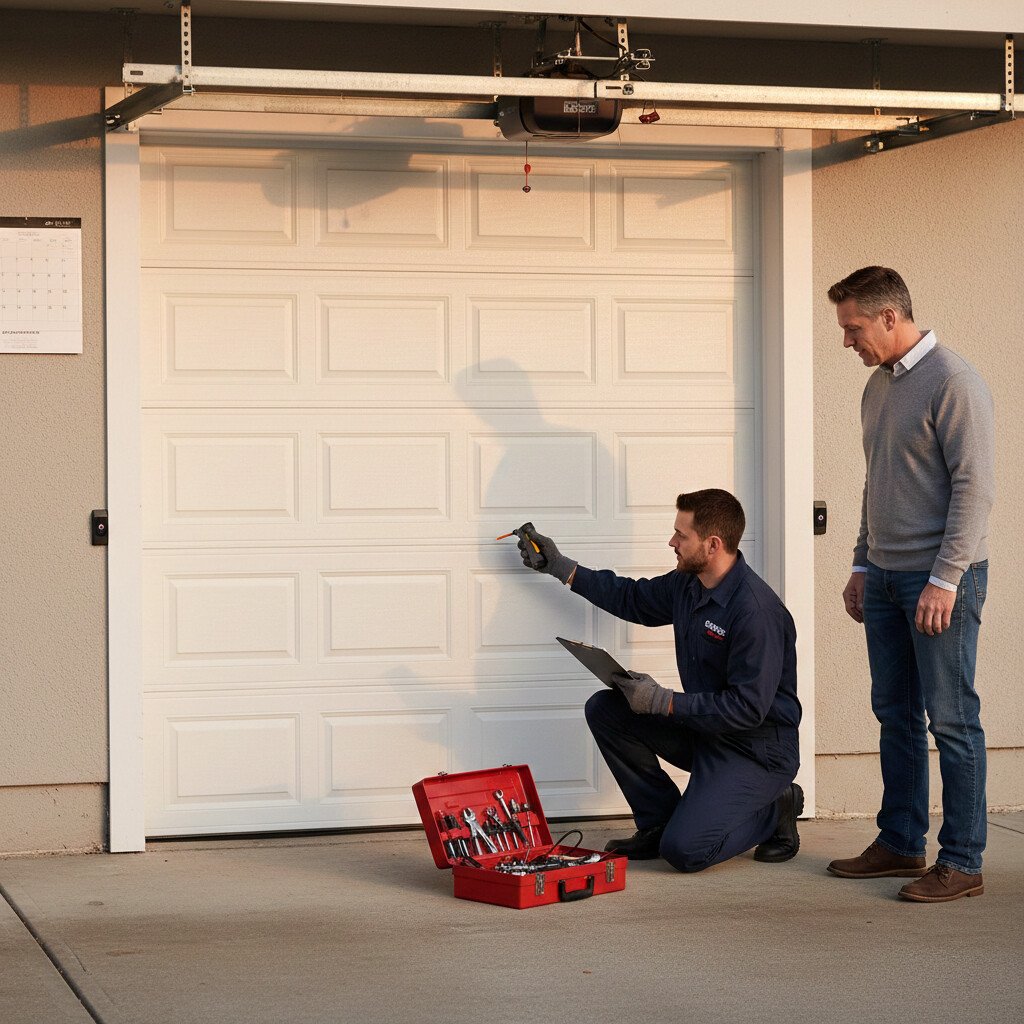
In five minutes, you can confirm your garage door is safe to operate by running a quick visual and functional check.
Stand clear of moving parts. Scan panels, hinges, rollers, and tracks for cracks, bends, or loose fasteners. Tighten visible lag screws. Look for frayed cables; don’t touch damaged ones.
Test balance: pull the opener release, lift halfway; it should hold. If it drops or shoots up, note spring tension issues.
Test force reversal with a 2×4 under the door; it must reverse. Verify photo-eyes: wipe lenses, confirm lights, and test beam.
Add these steps to your garage door safety maintenance checklist.
DIY or Call a Pro? Clear Rules for Safety
Although many checks are safe to do yourself, draw a hard line at anything under spring tension, load-bearing, or involving high voltage.
Embrace diy advantages for visual inspections, tightening loose hinge screws, lubricating rollers and bearings (non-swelling lubricant), clearing tracks, testing photo-eyes, and replacing remote batteries.
Do DIY smart: inspect, tighten hinges, lube rollers, clear tracks, test photo-eyes, swap remote batteries.
Use lockout/tagout by unplugging the opener before any work.
Stop and call for professional expertise when issues involve door balance, cable fray, bent tracks, opener wiring, motor faults, limit/force calibration, panel replacement, or door rehangs.
Never loosen torsion or extension hardware.
If a task needs special tools, permits, or two-person lifts, it’s not DIY.
If multiple wear points appear at once—rollers, hinges, tracks, and cables—it’s worth stepping back and assessing the overall system condition rather than patching one part at a time. This guide on how to tell if garage door repairs are still a smart investment helps you evaluate the big picture.
Inspect Garage Door Springs Safely (When to Stop)
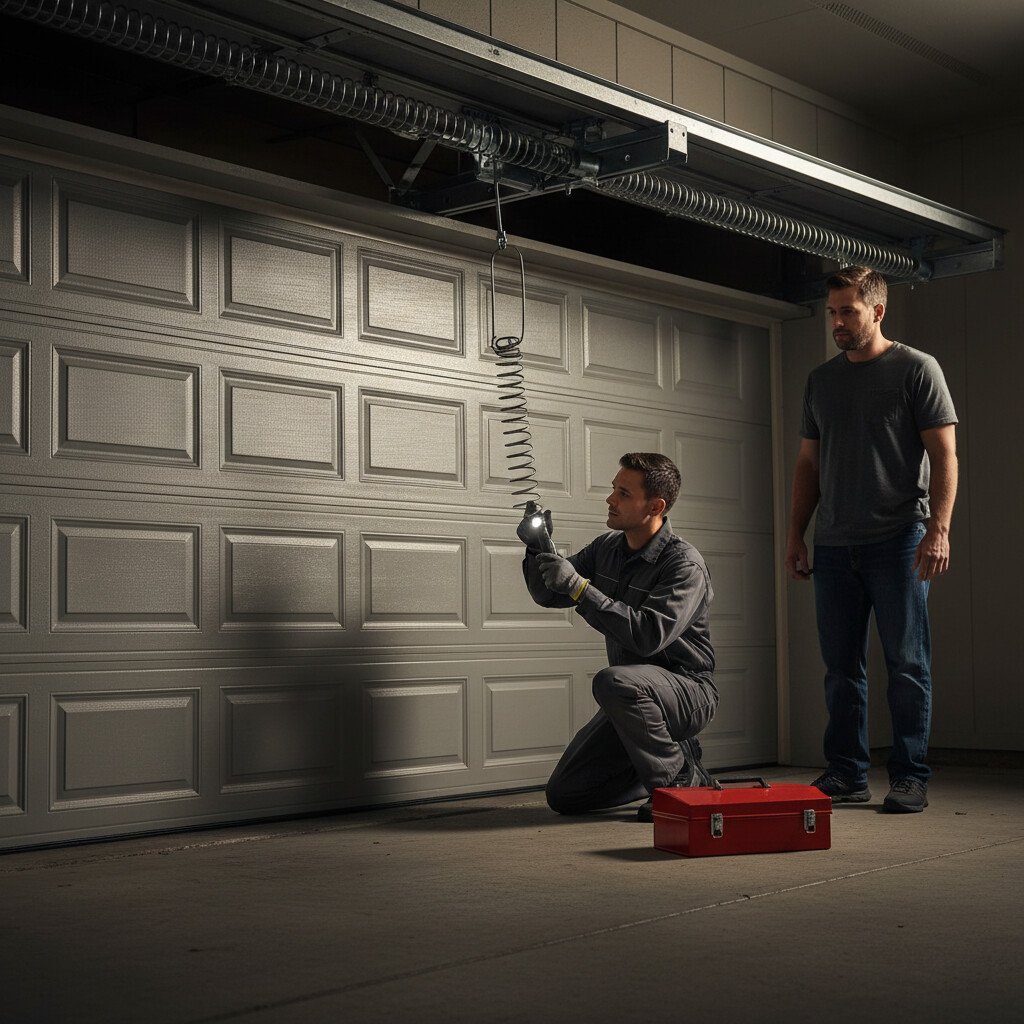
Before you inspect garage door springs, unplug the opener, lock the door in the down position, and keep your hands and tools away from coils, cones, and anchor points.
Wear safety gear: eye protection, gloves, and closed-toe shoes.
Visually check for gaps in torsion or extension coils, rust, frayed end loops, loose set screws, bent brackets, and off-center anchor bearings.
Listen for grinding or snapping sounds.
Test balance: lift the door manually halfway; if it falls or shoots up, spring tension is unsafe.
Don’t adjust winding cones, bars, or clamps yourself.
Stop immediately if you see cracks, deformation, or uneven lift—call a pro.
When internal parts begin deteriorating, early fast garage door repairs can help maintain smooth operation.
Check Garage Door Cables, Pulleys, and Rollers for Wear
Inspect cables for broken strands, rust, kinks, or flattened sections; if you see fraying or bulging at the drum, stop and schedule professional service.
Check rollers and pulleys for cracks, wobble, rough bearings, or seized motion, and replace worn parts rather than forcing operation.
Lubricate steel rollers and pulley bearings with a light garage-door lubricant (not grease), but don’t lubricate nylon roller treads or contaminated, frayed cables.
If you spot broken strands near the bottom bracket, rusted sections, or a cable that looks uneven on one side, don’t keep running the opener—those are early signs of a bigger failure. Use this practical walkthrough to safely repair garage door cables at home and fix the issue before it causes door imbalance, track damage, or a sudden drop.
Signs Of Cable Fraying
Frayed strands, kinks, or flattened sections on lift cables are early red flags that the door’s counterbalance is compromised.
During cable inspection, look for broken wires near the drum, bottom bracket, and anchor points—these high-tension zones show fraying indicators first.
Watch for rust, abrasion tracks, and bird-caging (bulging wraps).
Listen for scraping as the door moves.
If the door sags, jerks, or won’t stay mid-travel, suspect unequal cable stretch.
Never touch a damaged cable under tension.
Disconnect power, keep the door closed, and tag it out.
Replace cables in matched pairs and verify drum set-screws and cable seat alignment.
Roller And Pulley Lubrication
While the door’s cables handle the load, smooth rollers and free‑spinning pulleys keep that load moving safely—so keep them clean and lubricated.
Disconnect power to the opener and clamp the door tracks to prevent movement.
For roller maintenance, wipe debris from the stems and bearings; apply a light silicone or lithium spray to the bearings, not the tread. Replace cracked nylon or wobbly steel rollers.
For pulley inspection, check sheaves for chips, wobble, and bearing play; apply a drop of lubricant to the axle only.
Never oil belts or cables. Spin-test each part by hand. Replace seized or noisy components.
Clean and Straighten Garage Door Tracks to Prevent Binding
You’ll spot misaligned tracks by uneven gaps between the rollers and rail, rub marks, wobbling rollers, or a door that hesitates or rubs.
Disconnect the opener, clamp the door open, then vacuum debris, wipe rails with a mild solvent, and avoid adding grease to the track surface.
If the rails aren’t parallel, loosen mounting screws slightly, tap rails true with a rubber mallet and level, retighten hardware, and stop if the track is bent or binding persists.
If your door keeps binding even after cleaning, the track may be bent beyond a simple straighten-and-tighten fix. Use this guide on deciding between track straightening and full rail replacement to avoid repeat jams and premature roller wear.
Signs Of Misaligned Tracks
Ever notice the door shudder, rub, or stall halfway? Those are classic signs of misaligned tracks.
Perform a careful track inspection with the door disconnected from the opener and fully lowered. Look for daylight between rollers and rail, uneven roller wear, scraping marks, bent brackets, and loose or missing fasteners.
Check if horizontal tracks are level and vertical tracks plumb; small gaps at joints indicate shift. Listen for grinding or popping under slow manual movement.
Watch the cable drums—uneven cable tension suggests binding. If the door drifts open or won’t stay halfway, alignment’s off.
Stop operation and correct alignment before damage escalates.
Safe Track Cleaning Steps
Before you touch the tracks, disconnect power to the opener, clamp locking pliers below the bottom rollers to keep the door from moving, and wear gloves and eye protection.
Vacuum debris from both vertical and horizontal tracks. Wipe the channels with a lint-free rag dampened with mild cleaner; avoid oil. Inspect for dents, screws backing out, and rust. For minor bends, gently straighten with a rubber mallet and wood block.
Verify track alignment: measure equal spacing from track to jamb and ensure plumb/level. Tighten fasteners to manufacturer torque. Lubricate only rollers and hinges with silicone.
Remove pliers, restore power, cycle-test operation.
Test Garage Door Balance and Set Opener Force Limits
Two quick checks keep a garage door safe: verify the door’s balance, then set the opener’s force and travel limits.
Disconnect the opener. For balance testing, lift the door by hand to mid‑height; it should hold. If it rises or falls, springs need professional service—don’t adjust torsion hardware yourself.
Close the door, reengage the opener. Set travel limits per the manual so the door fully closes without crushing and fully opens without binding.
For force adjustment, place a 2×4 flat under the door; it should reverse upon contact. Also test upward reversal with light resistance.
Recheck after seasonal temperature changes.
Align and Clean Garage Door Opener Photo Eyes
Photo eyes—those small sensors at the bottom of the tracks—must be clean, aligned, and unobstructed for the opener’s safety reversal to work.
Keep garage door photo eyes clean, aligned, and clear to ensure reliable safety reversal.
Disconnect power. Verify mounting brackets are tight and not bent.
Perform photo eye cleaning: wipe each lens with a microfiber cloth and isopropyl alcohol; remove cobwebs and debris. Ensure both LEDs are solid when aligned.
For photo eye alignment, measure equal heights from the floor (typically 4–6 inches). Use a level to aim sensors directly at each other. Secure wiring away from wheels.
Test by closing the door and passing an object through the beam; the door should reverse immediately.
If cleaning and aligning the photo eyes doesn’t fix the issue, the door may be stopping for a different reason—like track resistance, imbalance, or opener force settings. Use this garage door opens partially and stops troubleshooting guide to identify the real cause before you keep testing the opener.
Decode Garage Door Noises: Squeaks, Grinding, and Bangs
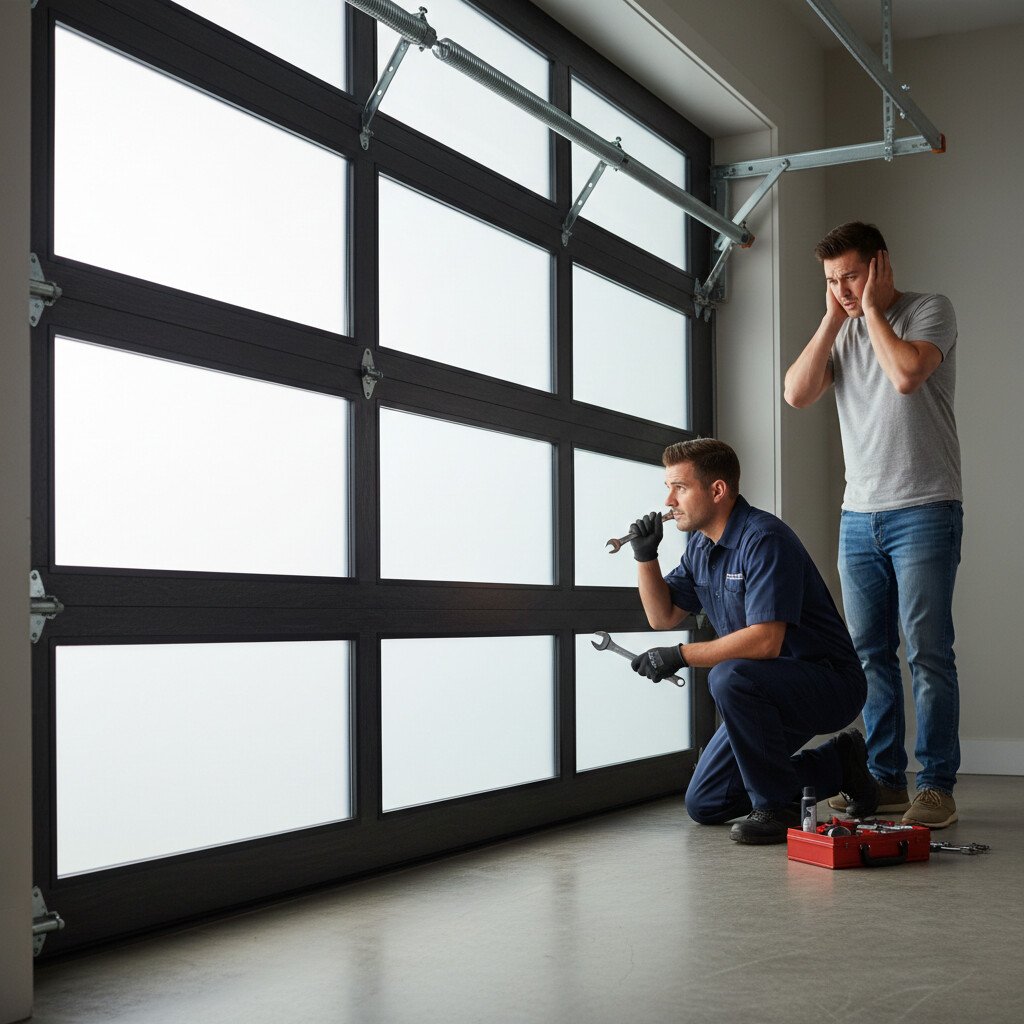
With the sensors clean and aligned, listen to what the door tells you. Track noise to its location. Identify squeak sources at hinges, rollers, and bearing plates; squeaks imply dry pivots or worn bushings.
Grinding gears point to a stripped opener drive, misaligned sprocket, or chain rubbing the rail. Rhythmic rumbles suggest flat-spotted rollers. Sharp bangs often mean a torsion spring slipping on the shaft or a panel slapping due to loose fasteners.
Stand clear of springs and lift cables; they’re under high tension. Cut the power before inspecting the opener.
Once you’ve matched the sound to a likely component, the next step is applying the right fix—tightening, lubricating, or replacing worn parts before the vibration gets worse. Use this guide on how to stop garage door noise and vibration step-by-step to calm the system and restore smooth travel.
Tighten visible hardware only if accessible and undamaged. Otherwise, schedule professional service.
Once you identify what the noise likely points to, the next step is understanding what that specific fix usually costs—rollers, hinges, track alignment, and spring issues don’t fall in the same price range. This breakdown of repair cost expectations by symptom and part helps you budget based on what your door is telling you.
Quick DIY Fixes and a Preventive Maintenance Schedule
Before problems snowball into costly repairs, knock out a few safe DIY tasks and set a simple maintenance cadence. Start with quick repairs: tighten hinge and track fasteners, lube rollers, hinges, and spring coils with garage-rated lithium spray, and clean photo-eyes. Test balance by disconnecting the opener; door should hold mid-travel—if not, call a pro for springs.
If you want that maintenance schedule to actually prevent repeat repairs, it helps to include the right small upgrades and inspection habits in the right order. Use this checklist of garage door longevity improvements that prevent recurring repairs to make your maintenance routine more effective.
Use this preventive maintenance schedule:
| Task | Frequency |
|---|---|
| Lubricate rollers/hinges/springs | Quarterly |
| Tighten hardware, check cables/rollers | Semiannually |
| Test auto-reverse, photo-eyes, balance | Monthly |
Don’t adjust torsion springs, lift cables, or high-tension hardware—those aren’t DIY.
Conclusion
You inspect, you test, you listen. You tighten, you lubricate, you align. You verify balance, you set force limits, you clean photo eyes. When parts crack, when cables fray, when springs groan—you stop and call a pro. By following a 5-minute safety check, by decoding noises early, by keeping tracks straight and rollers smooth, you prevent failures and protect people. Do small fixes confidently, defer hazardous repairs immediately, and schedule routine maintenance to keep your garage door safe and reliable.