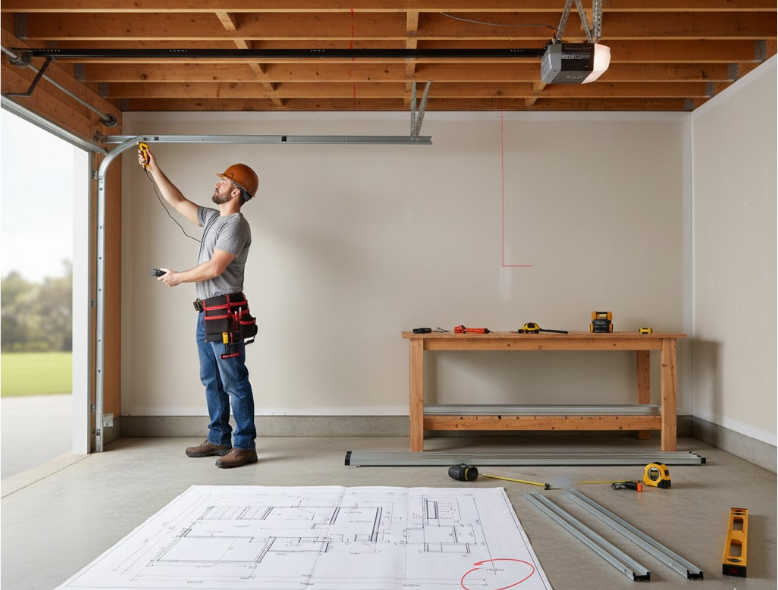
You’re about to measure more than a hole in a wall—you’re defining how smoothly your door will operate for years. Gather a tape, 4‑ft level, laser measure, and framing square. Verify the rough opening’s width, height, and squareness, then confirm headroom, backroom, and sideroom against your hardware specs. Check floor level and threshold for a tight seal. Note special cases like low-clearance tracks or wind-rated doors—because a 1/4 inch off here can cost you much more later.
Key Takeaways
- Measure rough opening width at top, middle, bottom and height at both jambs and centre; use the smallest values for ordering.
- Verify squareness by comparing diagonals; more than 1/4 inch difference indicates racking that must be corrected.
- Confirm headroom, backroom, and sideroom against track and spring requirements; note obstructions and opener clearances.
- Check floor level and threshold with a laser; record high/low points and ensure the bottom seal will fully contact.
- Document conditions, ensure studs for fastener embedment, and call a pro for sagging headers, out-of-plumb jambs, or inadequate clearances.
Accurate measurements matter because they affect every step of how garage door installation works, from framing to final alignment.
Essential Tools and Prep for Accurate Measurements
Assemble tools and prep the space to prevent errors. Use a checklist and verify each item: tape measure (25–35 ft, true-zero hook), 4‑ft level, laser meter, plumb bob, framing square, straightedge, stud finder, flashlight, marker, notepad, and camera. Wear PPE: safety glasses, gloves, closed-toe shoes.
Clear the door opening, tracks, and walls. Remove obstructions, cords, and stored items. Sweep and vacuum debris, ensure good lighting, stable temperature, and check electronic tool batteries. Label reference points consistently for repeatable measurements.
Measuring the Rough Opening: Width, Height, and Squareness
Start with the rough opening because it governs door sizing, track alignment, and sealing. Verify the framed aperture before ordering a door. Use consistent measurement techniques and record to 1/16 in. Measure width at header, mid-span, and floor; use the smallest value. Measure height at left, centre, and right jambs; again, use the smallest.
Use consistent 1/16-in precision. Measure width at header, mid, floor; height at left, centre, right—always use the smallest. Check squareness by comparing diagonals; a variance over 1/4 in indicates racking that needs correction. Confirm plumb jambs and a level floor to avoid panel binding and light gaps.
- Measure clear width: inside face of left jamb to inside face of right jamb.
- Measure clear height: finished floor to the underside of the header.
- Compare both diagonals for squareness.
- Note any shimming or planing required to true the rough opening.
Incorrect opening dimensions can delay the project, which is why measurement errors often increase garage door installation duration.
Headroom Requirements for Standard and Low-Clearance Systems
Although the rough opening sets door size, headroom dictates the track, spring type, and opener you can use. Measure headroom clearance from the finished header to the lowest obstruction (joists, duct, or flange). Record to the nearest 1/8 inch.
For standard lift torsion systems, you typically need 12 inches minimum; add 2 inches if a jackshaft isn’t used and a ceiling-mounted opener is planned. For extension springs, budget 10 inches minimum. If you have only 4–10 inches, specify a low-clearance kit with reduced-radius track and a front-mount torsion or EZ-set system.
Verify level across the header; more than 1/4-inch variance requires shimming. Note protrusions that reduce continuous clearance.
Select installation techniques that keep cables aligned, maintain drum-to-track offsets, and prevent coil bind under travel.
Backroom and Depth: Planning for Track and Opener Space
Measure the required backroom length from the header to the rear obstruction to confirm space for horizontal tracks and the door length when open.
Verify opener clearance needs, including rail length, trolley travel, motor head depth, and safety sensor line-of-sight.
Check track and spring spacing: maintain parallel track alignment, adequate shaft/spring offset, and clearance from joists, ducts, and lighting.
Opener selection depends on available backroom, so choosing the right garage door opener starts with proper depth measurements.
Required Backroom Length
Two dimensions define required backroom: the door height and the hardware/opener configuration. You’ll calculate backroom dimensions from the panel stack when the door is fully open, plus the horizontal track run-out and any trolley rail overhang.
Use a rigid tape and measure from the finished header face straight back along the ceiling plane. Typical installation considerations: standard lift needs door height plus 18–24 inches; low headroom kits reduce the add-on; high-lift adds the vertical rise before turning.
- Verify finished ceiling/joist obstructions along the track path.
- Confirm header plumb; shimming changes effective backroom.
- Account for strut depth on wide, insulated doors.
- Reserve service space for spring adjustment at the rear.
If space is short, select compatible lift hardware or reframe to achieve the minimum required length.
Opener Clearance Needs
Before selecting an opener, confirm the backroom and depth needed for the horizontal tracks, trolley or jackshaft hardware, and any rail overhang. Measure from the header to the back wall to verify you can place the motor unit, rail, and safety offsets without hitting ducts, lights, or storage. Account for door height, headroom, and the arc of the top section as it transitions to horizontal.
- Identify opener types and their clearance profiles: trolley units need full rail length plus motor depth; jackshaft units need side space and shaft access.
- Verify opener compatibility with door height, track radius, and obstruction sensors.
| Checkpoint | Minimum Consideration |
|---|---|
| Backroom length | Door height + 18–36 in (trolley) |
| Side clearance | 8–12 in (jackshaft side) |
| Motor mounting depth | 10–16 in below ceiling |
Track and Spring Spacing
Although backroom often gets framed around opener length, you also need to allocate precise depth for the horizontal tracks, spring assembly, and safety clearances. Measure from the header to the back wall; confirm you’ve got door height plus at least 18–24 inches for track sweep and opener rail.
Keep track alignment plumb and parallel so rollers don’t bind and drums wind evenly. Center the torsion tube, then verify spring tension with the door balanced half-open.
- Confirm horizontal track length equals door height plus 18–24 inches of run.
- Maintain 2–3 inches of side clearance to prevent jamb interference.
- Set track elevation level; allow 1–2 inches above the top section at full open.
- Reserve unobstructed space for spring cones, bearing plates, and cable drum service.
Sideroom Clearances for Tracks, Springs, and Hardware
Confirm the minimum sideroom required by your track type and spring system, typically specified per side by the manufacturer.
Measure from the jamb to adjacent walls, pipes, or electrical conduits, and note any projections that reduce usable clearance.
Flag obstructions for relocation or specify low-clearance hardware if measurements fall short.
Limited sideroom affects hardware choices, making garage door installation components a critical consideration during measurement.
Minimum Sideroom Requirements
While planning your layout, verify the minimum sideroom on both jambs to ensure tracks, spring assemblies, and lift hardware operate without interference. Measure from the finished opening to the nearest wall or obstruction. Use manufacturer installation guidelines to set baseline sideroom dimensions for your door type, track style, and spring system.
- Standard extension tracks typically need 3.5–5 in. per side; torsion setups often require 5–6 in.
- High-lift or vertical-lift configurations can demand 6–9 in. per side, depending on drum and cable clearance.
- Jackshaft operators increase sideroom requirements near the torsion shaft and opener head.
- Low-headroom kits shift clearances; confirm left/right asymmetry if specified.
Confirm plumb jambs and consistent wall plane so brackets seat flush.
Account for fastener edge distances and conduit or trim thickness before finalizing layout.
Obstruction and Clearance Checks
Map all potential sideroom obstructions, conduit, gas lines, wall-mounted openers, sprinklers, torsion couplers, bracing, low soffits, and irregular masonry. Measure jamb-to-wall at multiple heights; record the tightest value and compare to manufacturer clearance standards for tracks, flag angles, bearing plates, and springs.
Verify minimum sideroom: standard torsion 6–7 in, high-lift 8–12 in, jackshaft 12–18 in (operator side). Check fastener depth; relocate utilities if needed.
Ensure plumb walls; shim tracks if variance >1/8 in over 8 ft. Maintain 1 in wiring offset. Document exceptions and specify alternate hardware if clearances aren’t met.
Checking Floor Level and Threshold for Proper Sealing
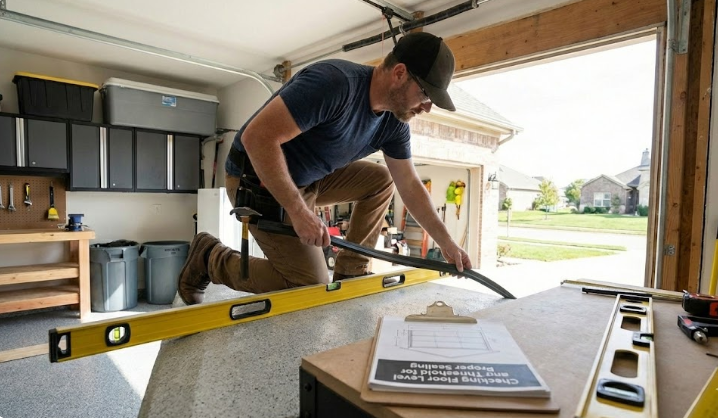
Before you measure door height or set tracks, verify the slab is level and the threshold will seal uniformly across the opening.
Establish a reference line across the jambs, then check floor slope with a laser level or a tight string line. Record high and low points, noting the differential. Compare that variance to your bottom seal compression range and desired threshold height to prevent gaps or excessive drag.
- Snap a chalk line at the finished floor; measure deviations every 12–18 inches.
- Mark the floor’s high point; set bottom bracket elevations from this datum.
- If slope exceeds seal travel, plan to shim tracks or install a beveled threshold.
- Dry-fit the door bottom seal; confirm continuous contact without buckling or daylight.
Special Cases: Insulated, Wind-Rated, and Custom-Sized Doors
With the floor level and threshold sealing confirmed, account for door types that alter measurement strategy. For insulated doors, measure rough opening width/height, then verify headroom and sideroom against increased panel thickness and R-value seals; add clearance for thicker end stiles and bottom astragal compression. For wind rated doors, capture jamb-to-jamb anchoring zones, header substrate thickness, and track spacing; note required reinforcement strut count and operator bracket placement. For custom sizing, record true masonry-to-masonry dimensions, out-of-square deltas, and lintel camber; specify track radius and spring index to match weight.
| Door Type | Critical Measurements | Notes |
|---|---|---|
| Insulated doors | Headroom, sideroom, panel thickness | Allow seal compression |
| Wind rated doors | Anchor spacing, strut count, header | Confirm substrate |
| Custom sizing | True opening, squareness, camber | Define track radius |
| All types | Backroom, operator clearance | Verify weight specs |
When to Bring in a Pro: Red Flags and Precision Checks
Although many measurements fall within DIY scope, call a professional when critical tolerances or structural cues don’t align. If your header sags, jambs aren’t plumb, or the slab isn’t level, stop. Precision errors compound into binding tracks, noisy operation, and premature spring wear. A professional installation eliminates guesswork and corrects hidden framing issues that skew your readings.
If tolerances drift or framing looks wrong, stop. Small errors snowball—bring in a pro before damage mounts.
- Verify rough opening: width/height within ±1/8 in, diagonals within 1/4 in; larger deviations require remediation.
- Check headroom and backroom: compare to manufacturer spec; obstructions or low joists demand alternate hardware.
- Measure track centers: ensure parallelism and equal reveals; misalignment signals twisted framing.
- Assess torsion shaft level and centerline: drift indicates bearing plate or anchor problems.
Don’t normalize “close enough.” That’s how common mistakes become chronic failures.
If measurements fall outside standard ranges, this DIY or hire a pro guide can help you decide when professional precision is worth it.
Conclusion
You’ve measured like a machinist, not a carpenter’s guess. Treat your garage like a bridge: one eighth-inch error compounds. In one install, a 1/8″ low jamb forced a 3/8″ track shim, causing roller bind and opener strain—proof that precision pays. Verify rough opening, headroom, backroom, and sideroom; check squareness and floor level; confirm hardware clearances. For insulated or wind-rated doors, follow spec sheets exactly. If tolerances exceed 1/8″, stop, recheck, or call a pro before you fasten anything.